Set-up & Mounting Your Classic Garment Pannier
Rack Mounting Set-Up
When you first receive your new pannier, take a minute to set it up properly for your rack. Follow the steps below to get a proper fit.
Set the pannier on your rack one side at a time to find the best positioning for the rack components.
|

|
|
The lower catch will slide all the way down on the track and should be tightened at the screw after finding the correct position in behind one of the side rails. The catch can be reversed if necessary to work with an alternate side rail.
|
|
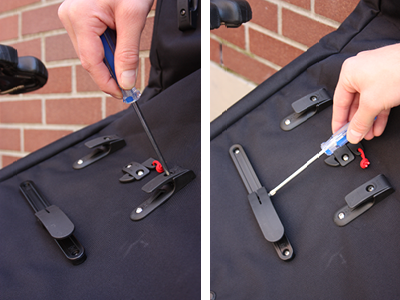
Check Vario mounting hooks (x4) for proper fit with rack tube diameter. Hooks can be adjusted to fit 6 -16 mm rack thickness. The hooks should be tightened to the point where the mounting hooks make a “click” when snapped down on your rack.
|
|
|
Adjust all mounting hardware using a standard philips (+) screwdriver.
|
|
Mounting Steps
Slide the bottom in first and then follow down with the Vario Mounting Hooks.
|

|
|
Components should fit snug and stay tight down on the rack.
|
|
Turn center lock so it hooks underneath the main rack bar. This ensures the pannier stays locked on the rack and can not pop off. |
|
|
Sides should sit flat, both lower catch tight behind the side bars, mounting hooks completely snapped down and the center locks engaged.
|
|


